

Picture this: you’re planning a family day out in Madrid, the kids are buzzing with excitement, and you suddenly realize you still need a safe ride that can fit everyone – plus those mandatory child seats.
Does that feeling of a last‑minute scramble ever make you wonder if there’s a hassle‑free solution?
Good news: Madrid’s minibus fleets aren’t just about roomy interiors and polished leather; many operators now offer child‑seat packages that meet Spain’s safety standards, so you can breathe easy while the little ones stay snug.
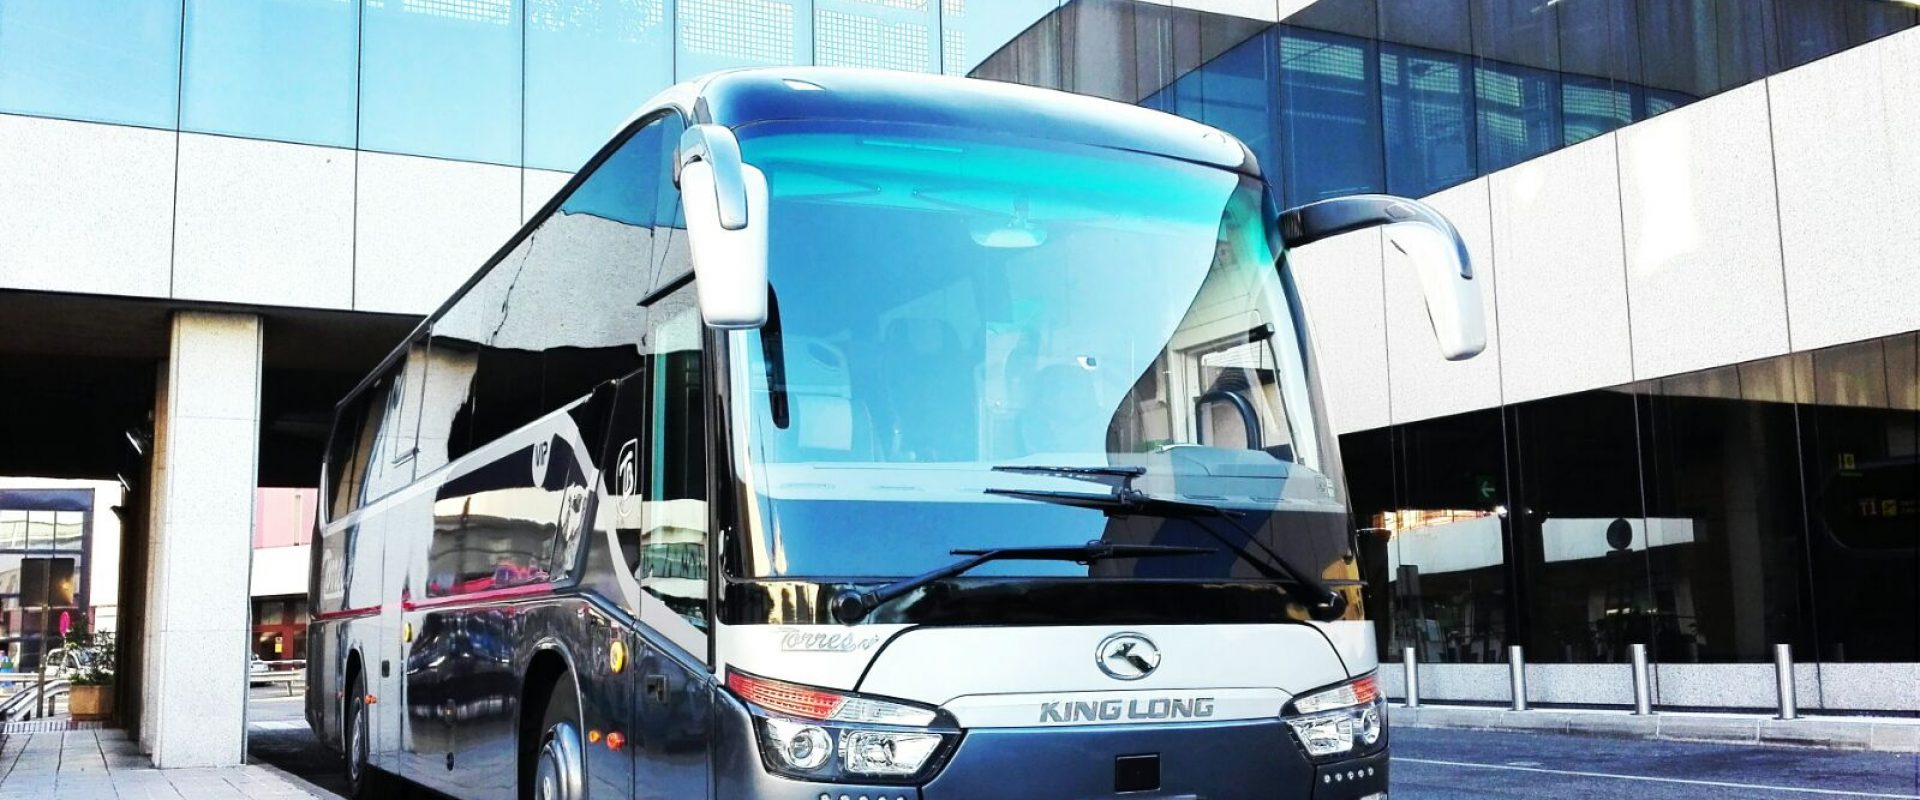
And because Torres Bus has been ferrying groups across the capital for over three decades, they know exactly how to rig a 12‑seat van with the right boosters without cramming the back row.
Think about the peace of mind that comes from a driver who double‑checks each seat, locks the harnesses, and still manages to crack a joke about the city’s famous churros as you roll past Plaza Mayor.
You might be wondering how much extra cost this adds, or whether you need to bring your own seats. In reality, most providers bundle the seats into the hourly rate, and the price difference is often just a few euros – a small price for big safety.
So, before you book that minibus for your next school trip, wedding party, or weekend getaway, ask yourself three quick questions: Do I have the right number of seats? Are the child‑seat options certified? Will the driver handle installation with care?
If the answer is a confident yes, you’re ready to lock in a ride that keeps the whole family safe and happy – and lets you focus on the fun part of the day, like finding the best view of the Royal Palace.
Ready to see how easy it can be? Let’s dive into the details of Madrid minibus with child seats hire, from choosing the right vehicle to checking safety certifications, and finally scoring the best deal for your budget.
TL;DR
Looking for a hassle‑free way to move your family or group around Madrid? With madrid minibus with child seats hire, you get a licensed driver, certified seats, and a few euros extra for peace of mind—so you can focus on the fun and enjoy the city’s sights together right now.
Step 1: Determine Your Group Size and Child‑Seat Needs
First thing’s first – how many people are actually coming? It sounds simple, but the moment you start counting grandparents, cousins, and that one aunt who always brings extra snacks, the numbers can jump from 6 to 12 in a heartbeat.
Take a minute to write down every name on a sticky note. Then, next to each name, add a little icon: a seat for adults, a booster for kids, maybe a car seat for a toddler. Seeing it laid out visually helps you spot gaps before you even pick up the phone.
What’s the legal side of child‑seat requirements?
In Spain, any child under 12 years old or shorter than 135 cm must be in an approved child‑seat. That means a typical 12‑seat minibus often needs at least two or three boosters, depending on the ages you’re transporting.
Don’t worry – most minibus operators in Madrid, including Torres Bus, already stock the right‑type seats and the driver will install them for you. Still, it’s worth confirming the exact model (i.e., ISOFIX‑compatible or harness‑type) before you sign the contract.
And here’s a quick sanity check: if you have three kids under four, you’ll need three rear‑facing seats. If you have a mix of ages, a combination of rear‑facing, forward‑facing, and booster seats will do the trick.
Size matters – but not the way you think
When you look at the vehicle options, don’t just focus on the total number of seats. Think about the layout. A 12‑seat van with a “U‑shape” arrangement gives you easy access to the child seats, while a straight‑row setup can make it trickier for the driver to double‑check each harness.
Ask the provider whether the driver can walk down the aisle and secure each seat before you set off. A good sign is when they say they’ll do a “pre‑departure safety check” – that’s the kind of detail that saves you from a last‑minute scramble.
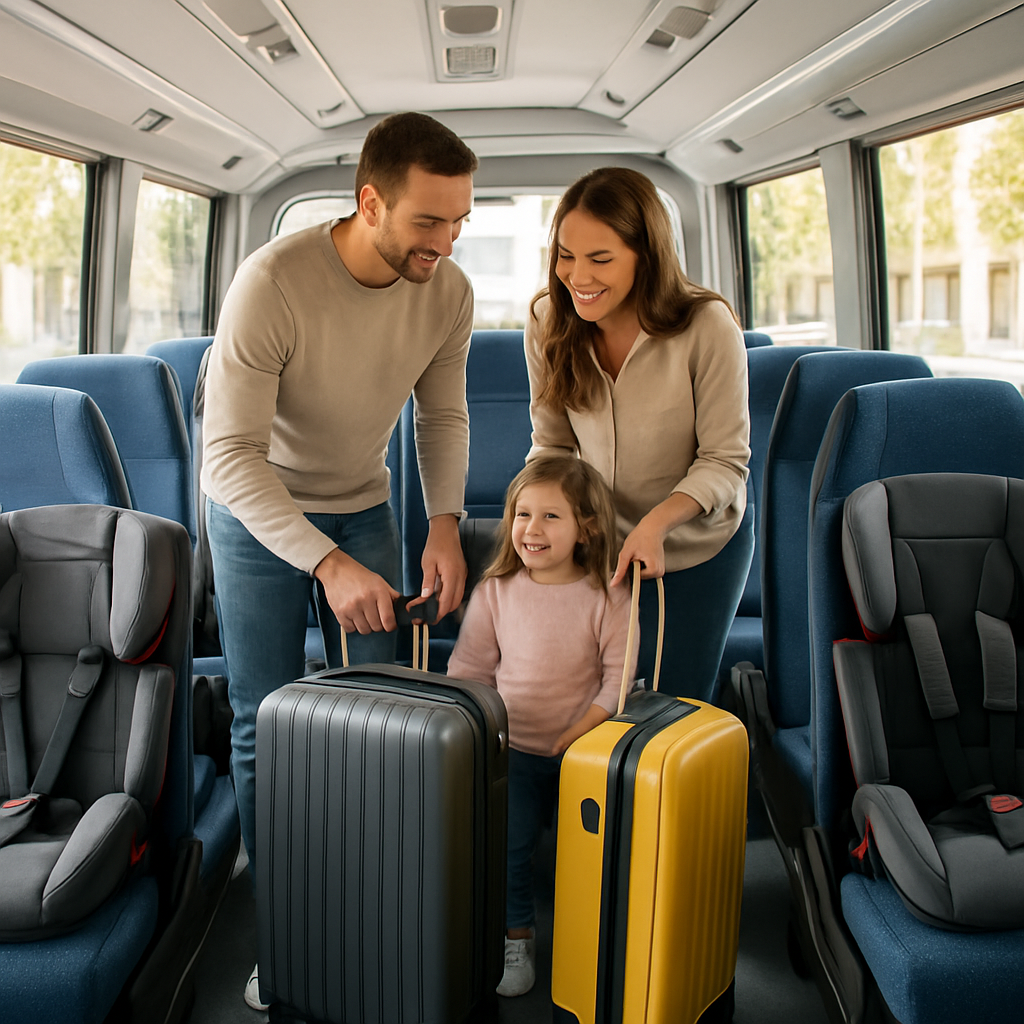
One tip that’s often overlooked: consider luggage space. Kids come with strollers, diaper bags, and that one giant snack cooler. If you’re cramming everything into the back, you might end up with a cramped ride that defeats the whole safety purpose.
Practical checklist
- Count total passengers (adults + children).
- Identify each child’s age and height.
- Match each child with the appropriate seat type.
- Confirm the minibus layout supports easy seat access.
- Ask about the driver’s safety‑check routine.
Once you’ve ticked those boxes, you’ll have a solid picture of the exact vehicle you need. If you’re still unsure, Everything You Need to Know About Minibus Hire Madrid with Driver walks you through the decision‑making process step by step.
Now, let’s talk about making the ride enjoyable for the little ones. A happy child is a quiet child, and a quiet child means a smoother journey for everyone.
Pack a few lightweight toys that don’t take up seat space – think small puzzle books or magnetic tiles. If you want to go the extra mile, consider a small, portable activity kit from Poppa’s Wooden Creations. Their handcrafted wooden toys are not only safe, they also double as quiet, mess‑free entertainment during a 2‑hour tour of Madrid.
And don’t forget the snack strategy. A handful of healthy bites (fruit slices, crackers) kept in a zip‑lock bag can keep hunger‑driven meltdowns at bay. Just avoid anything that could spill onto the seats – you don’t want to damage the child‑seat fabric.
Seeing a real‑world example of a family loading up a minibus can help you visualise the process. Watch the video above for a quick walkthrough of how a driver checks each child seat, secures the harnesses, and even offers a friendly tip about the best route to the Royal Palace.
After the video, you might be wondering about the extra touches that turn a simple transport job into a memorable family outing. That’s where a bit of décor can go a long way – think a small banner or a few colourful balloons that match the theme of your day trip. For parties or school outings, Towarna Festyny offers a range of kid‑friendly decorations that are easy to pack and set up once you arrive at your destination.
Finally, give yourself a little buffer time. Arrive at the pick‑up point 15‑20 minutes early so the driver can double‑check every seat, lock the doors, and maybe even share a quick joke about churros with the kids. That extra minute of calm sets the tone for the entire journey.
When you’ve nailed down the numbers, the seat types, the vehicle layout, and the little extras that keep the kids smiling, you’re ready to book the perfect Madrid minibus with child seats hire. The rest is just pulling up the windows, feeling the city breeze, and enjoying the ride.
Step 2: Locate Certified Minibus Operators Offering Child Seats
Now that you know exactly how many seats you need, the next puzzle piece is finding a company that actually provides those child seats – and, more importantly, guarantees they’re up to Spanish safety standards. It can feel like hunting for a needle in a haystack, but with a few focused moves you’ll have a shortlist in no time.
Start with a quick online check
Type «madrid minibus with child seats hire» into your favorite search engine. Look for operators that mention certified seats right in the meta description – that’s usually a good sign they’ve thought about safety from the get‑go.
Make a simple table: company name, vehicle sizes they offer, and whether child‑seat bundles are listed. If the site only talks about “luxury vans” without mentioning seats, flag it for a deeper call later.
Ask the right questions
Give the shortlisted firms a quick call. Here’s a cheat‑sheet of questions that cuts through the fluff:
- Are the child seats CE‑marked or ECE‑R44/04 certified?
- Do you provide rear‑facing seats for infants and forward‑facing seats for toddlers?
- Is the driver trained to install and double‑check each harness?
- Is there an extra charge for the seats, or are they bundled into the hourly rate?
Take notes – you’ll spot patterns. A company that can answer all four without hesitation is usually the one you want.
So, what should you do next?
That short video walks you through a typical seat‑installation demo, showing exactly how a driver secures a rear‑facing seat in a 12‑seat minibus. Watching it can give you peace of mind before you even step onto the vehicle.
Verify certifications and insurance
Ask for a copy of the operator’s safety certificate – most reputable firms will email you a PDF straight away. Cross‑check the document number on the Dirección General de Tráfico (DGT) website, or simply ask the provider to confirm the registration number.
Insurance matters, too. The policy should cover both passenger liability and equipment (the child seats). If the insurer is a well‑known Spanish carrier, you’re in safer hands.
Check the seat installation process
Even certified seats are useless if they’re slapped on haphazardly. Request a brief description of how the driver handles installation: do they pre‑fit the seats before you board, or do they set them up while the kids are already inside? The best practice is pre‑installation, followed by a final check with you before the trip starts.
And remember, a quick “Can you show me the harness tightened?” moment can save a lot of worry later.
Read reviews and ask for references
Glance at Google reviews, TripAdvisor, or local parenting forums. Look for recurring comments about “child‑seat safety” or “driver professionalism”. If you see multiple mentions of a smooth seat‑setup, that’s a green flag.
If you’re still unsure, ask the operator for a reference – a recent family or school that used the same service. A quick call can confirm whether the seats were truly certified and properly installed.
Actionable checklist
- Search «madrid minibus with child seats hire» and list operators that mention certified seats.
- Call each short‑list and ask the four key safety questions.
- Request and verify safety certificates and insurance details.
- Confirm the driver will pre‑install seats and give you a final harness check.
- Read online reviews for repeated safety praise; ask for a recent client reference.
Follow these steps, and you’ll walk away with a provider you can trust – one that lets you focus on the fun part of the day, like picking the best churro stand in Plaza Mayor, instead of fretting over seat‑belt ratios.
Step 3: Compare Prices, Services, and Safety Features (Video Overview)
Alright, you’ve got your list of operators and you’ve asked about the seats. Now it’s time to put the pieces together and see which offer gives you the best bang for your euro.
Break down the price sheet
Don’t just glance at the hourly rate. Ask for a detailed quote that separates the base vehicle cost, the child‑seat surcharge (if any), fuel, tolls, and any extra fees like driver overtime.
When you see a line that says “€5 extra per seat,” picture that as the price of a tiny, CE‑marked booster that will keep your toddler safe. If a company bundles everything into one flat fee, that’s usually a good sign – fewer hidden costs later.
So, what should you actually write down? Grab a quick spreadsheet and create columns for:
- Base minibus price per hour
- Child‑seat package cost
- Fuel & toll estimate
- Driver allowance (night shift, weekend)
- Total per‑hour cost
Now you can compare apples‑to‑apples across providers.
Service checklist – what really matters?
Price is only one side of the coin. Below are the service items you should verify before you click “confirm.”
- Certified seats – CE‑marked or ECE‑R44/04, installed by a driver trained in DGT regulations.
- Pre‑installation – seats fixed before you board, with a final harness check you can see.
- Driver credentials – licensed, with documented experience handling child‑seat installations.
- Insurance coverage – passenger liability plus equipment protection.
- Flexibility – can the driver adjust seat layout if you add a last‑minute guest?
Mark each item with a green check or a red X. The operator that scores green on all fronts is the one you’ll feel confident about.
Watch the video – see the process in action
We’ve added a short video that walks you through a typical seat‑installation on a 12‑seat minibus. Notice how the driver double‑checks the harness, secures the rear‑facing infant seat, and then walks you through the safety latch.
If the video shows a rushed job or a driver who seems unsure, that’s a red flag. A calm, methodical demonstration tells you the company takes safety seriously.
Does the video make you feel more at ease? Good. If you’re still on the fence, replay it and watch the driver’s hand movements – that’s the kind of detail you want in real life.
Side‑by‑side price table (example)
Here’s a quick mock‑up of what a comparison might look like for a 4‑hour hire with two infant seats and two boosters.
Provider A: €120 base + €15 seats + €20 fuel = €155/hr totalProvider B: €130 flat (includes seats, fuel, driver) = €130/hr totalProvider C: €110 base + €30 seat surcharge + €25 fuel = €165/hr totalEven though Provider A’s base rate is lower, the extra seat fees push the total higher than Provider B’s all‑in price. That’s why you need the breakdown.
Final quick‑check before you book
Take a minute, close your eyes, and picture the day of the trip. You’re loading the kids, the driver greets you, you see the seats already snug, you give a quick “tight enough?” nod, and everyone’s off to see the Royal Palace.
If that vision feels smooth, you’ve probably found the right match. If anything feels shaky – a vague price, missing safety doc, or a driver who can’t explain the seat type – walk away. It’s worth spending a few extra euros for peace of mind.
Bottom line: compare the full cost, verify every safety service, and let the video reassure you that the process is solid. When all three line up, you’ll know you’ve nailed the best deal for your madrid minibus with child seats hire.
Step 4: Book and Confirm Child‑Seat Installation Details
Now that you know how many seats you need and which operator checks all the safety boxes, it’s time to lock in the actual installation plan. Think of this as the moment you ask the driver, “Hey, will the seats be ready before we load the kids?” – because a smooth start saves everyone from a frantic scramble at the pick‑up point.
Ask for a written installation timeline
When you place the booking, request a short email that spells out when the driver will pre‑install each seat. A typical timeline looks like this:
- 48 hours before arrival – driver confirms the exact seat models (rear‑facing infant, forward‑facing toddler, booster).
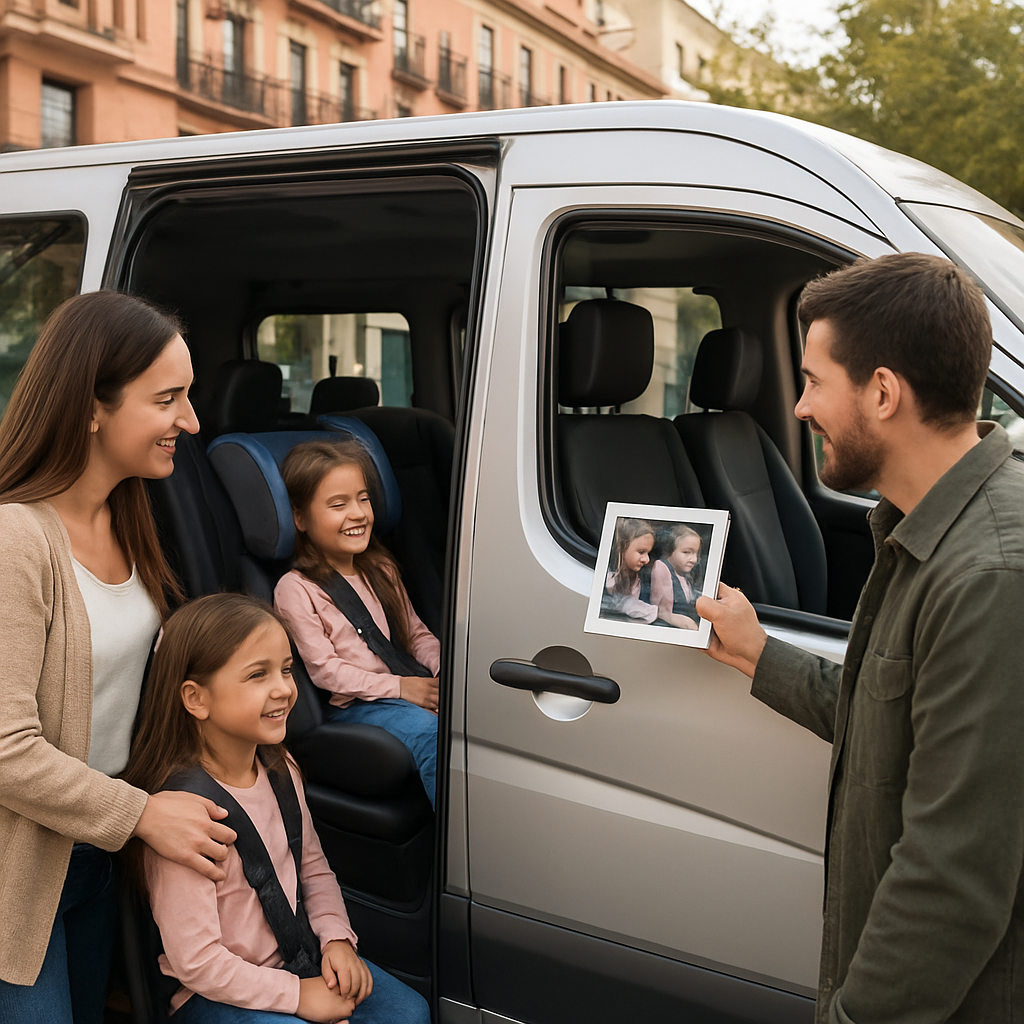
- 2 hours before loading – driver arrives at the depot, secures the seats, and snaps a photo of the harnesses tightened.
- 15 minutes before you board – driver meets you at the meeting point, shows the photo, and walks you through a quick “tight enough?” check.
Having that written record not only proves the service was promised, it also gives you a concrete point of reference if anything looks off on the day.
Real‑world example: a school field trip to Segovia
Ms. Alvarez booked a 20‑seat minibus for a 30‑student class plus 5 teachers. She asked the provider to pre‑install three rear‑facing infant seats and two boosters. The driver sent her a photo of the three infant seats already bolted to the rear row, with the harnesses clipped. When the bus arrived, the kids hopped in, the teachers double‑checked the harnesses, and the trip started five minutes early. The whole school praised the “no‑stress” start, and the driver earned a thank‑you note from the principal.
What to verify on the confirmation email
Look for these key details:
- Exact seat models and CE/ECE‑R44/04 certification mention.
- Driver’s name, license number, and a note that they’re trained in child‑seat installation.
- Any extra fees (most reputable firms, like those listed on approved child and baby safety seats, include the seats at no additional charge).
- Policy for last‑minute changes – e.g., “We can add one extra booster up to 2 hours before departure at no extra cost.”
If any of those items are missing, give the provider a quick call and ask for clarification. A confident answer is a good sign that the driver really knows the gear.
Step‑by‑step checklist you can print
Before you hit “confirm,” run through this short list:
- Write down the exact number and type of seats you need.
- Ask the driver to confirm the seat models and certification.
- Request a photo of the installed seats + a timestamp.
- Check that the driver’s name and DGT‑approved training are listed.
- Confirm there are no hidden surcharges for the seats.
- Ask what the procedure is if a seat appears damaged on arrival.
Tick each box and you’ll walk away feeling 100 % certain the kids will be safe from the first minute they step onto the bus.
Tips from seasoned parents
One mom shared that she always asks the driver to “show me the latch release” before the trip begins. It sounds tiny, but it lets you see that the driver can actually open the belt quickly in case of an emergency. Another parent swears by calling the driver 30 minutes before pickup just to hear a brief “seats are set, harnesses checked” – the reassurance is worth the extra call.
And here’s a small pro tip: bring a portable seat‑belt cutter in the back. It’s a cheap safety gadget that can cut a stuck strap in seconds, and most drivers will appreciate you having it on hand.
What to do if something goes wrong
If the driver arrives and the seats are missing or look different from the photo, stay calm and ask for an immediate fix. A reputable company will either install the correct seats on the spot or provide a replacement vehicle. If they can’t resolve it within 15 minutes, you have the right to cancel without penalty – the written timeline you secured earlier will back up your claim.
In practice, most operators understand that a missing seat is a deal‑breaker, so they’ll act fast. Your firm stance, backed by the checklist, tells them you mean business.
Final “ready‑or‑not” moment
Picture this: you’re at the meeting point, the driver greets you, shows the photo on their phone, you both do a quick harness tug test, and the kids are already giggling in their seats. That mental snapshot is the sign you’ve nailed the booking.
Take a breath, give yourself a mental high‑five, and then head to the departure point knowing every child‑seat detail is locked in. The rest of the day – the sights, the snacks, the laughs – will flow naturally once the safety piece is solid.
Step 5: Review Insurance, Cancellation Policies, and Extras (Comparison Table)
Alright, you’ve nailed the seats and the driver – now it’s time to peek behind the contract. What’s the safety net if the bus breaks down, the weather turns sour, or the driver calls in sick? That’s where insurance, cancellation rules, and the little‑extra perks come into play.
First thing’s first: does the provider carry a passenger‑liability policy that actually covers your group? You want a policy that not only protects the adults but also the child‑seat equipment. Think of it as a safety blanket for the whole family.
Insurance basics you can’t skip
Ask for a copy of the insurance certificate. Look for two key bits: a minimum €1 million passenger liability limit and a clause that lists “child‑seat equipment” as covered. If the insurer is a recognized Spanish carrier – like Mapfre or AXA – you’re in good hands.
Why bother? Because a minor mishap (a busted tire, a delayed route) could otherwise leave you footing the bill for medical costs or damage to the seats you paid extra for.
Cancellation policies – keep your options open
Life happens. Maybe the school decides to postpone the field trip, or a sudden rainstorm forces you to reschedule. A solid cancellation policy will let you pull the plug without losing the deposit.
What to hunt for? A free‑cancellation window of at least 48 hours, plus a clear, written refund schedule (e.g., 100 % back if you cancel 48 h before, 50 % at 24 h). Avoid vague phrases like “subject to availability” – you need a concrete deadline.
Pro tip: ask the provider to email you the cancellation clause. Having it in writing gives you leverage if you ever need to invoke it.
Extras that make the ride smoother
Now, let’s talk about the nice‑to‑haves that can save you headaches on the day of travel. Does the driver come pre‑trained in child‑seat installation? Do they offer a quick “harness check” before you board? Those little assurances can turn a good experience into a great one.
Other extras to consider: on‑board Wi‑Fi for the teens, a portable seat‑belt cutter (just in case), and even a small cooler for drinks. If any of these are listed as “optional” but cost extra, weigh whether they’re worth the fee.
And here’s a quick reality check: many operators bundle the seats, insurance, and driver training into a flat rate. That’s usually the safest bet – no surprise line‑item charges later.
How to compare everything at a glance
Sometimes the best way to see which provider wins is to slap the data into a simple table. Below is a starter template you can copy into a spreadsheet or print out for the meeting.
| Feature | What to Look For | Why It Matters |
|---|---|---|
| Insurance coverage | Passenger liability + equipment (child seats) | Protects you if something goes wrong on the road. |
| Cancellation policy | Free cancellation up to 48 h, clear refund terms | Gives you flexibility for weather or schedule changes. |
| Extras | Pre‑installed seats, driver‑trained in seat installation, on‑board Wi‑Fi | Adds comfort and peace of mind without surprise fees. |
Fill in the rows with each provider you’re eyeing and you’ll instantly see who offers the most value.
So, what’s the next step? Grab that insurance PDF, jot down the cancellation deadline, and ask the driver a quick “can you show me the latch release?” question. If they can answer confidently, you’ve got a winner.
Remember, the goal isn’t just to get a bus that moves – it’s to get a bus that moves you forward without any nasty surprises. When insurance, cancellation terms, and extras line up, you can breathe easy and focus on the fun part: watching the kids giggle as the minibus rolls past the Royal Palace.
Step 6: Prepare for the Trip and Conduct a Final Safety Check
You’ve locked in the minibus, the child seats are promised, and the day is finally here. Before the kids start chattering about churros, let’s make sure everything is buttoned up so you can relax once the engine hums.
First thing’s always the same: a quick mental pause. Does the driver have the exact seat models you asked for? Did you get that photo of the installed seats? If anything feels fuzzy, grab your phone and ask right now.
Create a pre‑trip safety checklist
Put pen to paper (or a note on your phone) and copy this list. It takes less than two minutes, and it saves you from a frantic scramble at the pickup point.
- Seat models and CE/ECE‑R44/04 certification listed.
- Driver’s name, license number, and DGT‑approved child‑seat training confirmed.
- Written timeline showing when seats will be pre‑installed.
- Photo of the installed seats with timestamp attached to the email.
- Insurance certificate that covers passenger liability + equipment.
- Cancellation policy reminder – free up to 48 h.
Check each item off as you verify it. A ticked box is a tiny confidence boost.
So, what should you do next?
Do a walk‑through on the day
Arrive a few minutes early. The driver should greet you with the photo on their phone. Take a quick look yourself – does the rear‑facing infant seat sit snug against the back wall? Are the harness straps flat and free of twists?
If something looks off, speak up politely but firmly. “I see the latch looks loose – can we tighten it before we load?” Most drivers will fix it on the spot because safety is their reputation.
While you’re there, run a simple “tug test.” Pull each harness gently; it should give just a little give but not slip. That tiny motion tells you the belt is locked correctly.
Does this really matter? Absolutely. A loose harness can turn a smooth ride into a panic in seconds, and you’ll thank yourself for catching it before the first child climbs aboard.
Final driver hand‑off and documentation
Ask the driver to hand you a one‑page safety sheet. It should list:
- Seat types and their placement.
- Driver’s contact number for the day.
- Procedure if a seat appears damaged (who to call, replacement timeline).
- What to do in case of an emergency – where the fire extinguisher and first‑aid kit are located.
Having this on paper feels old‑school, but it’s a solid backup if your phone dies or the Wi‑Fi drops.
And don’t forget to get a quick verbal confirmation: “All seats are installed, harnesses checked, and we’re good to go.” That little phrase seals the agreement.
Quick‑fire sanity check before you board
Take a breath, close your eyes for a second, and picture the kids buckling in. Now run through this mental list:
- Seats match the photo and the checklist?
- Harnesses snug, no twists?
- Driver’s name and license visible?
- Insurance and cancellation docs in hand?
- Emergency equipment located?
If you can answer “yes” to every point, you’re ready to roll. If any answer wavers, pause and ask the driver to clarify – it’s better to delay a minute than to risk a mishap later.
One last tip: keep a small pocket‑knife or seat‑belt cutter in the back seat. It’s cheap, it fits in a glove compartment, and it can be a lifesaver if a strap gets jammed.
When everything’s checked, you can step onto the bus, greet the driver, and let the kids settle into their seats. The rest of the day – the sights, the snacks, the laughter – will unfold smoothly because you nailed the safety prep.
Enjoy the ride, and remember that a few minutes of diligence now means a whole day of peace of mind.
Conclusion
After walking through the whole process – from counting seats to confirming certificates – you’ve built a safety net that lets you enjoy Madrid without a hitch.
Remember, the peace of mind you get from a trusted operator like Torres Bus isn’t just about ticking boxes; it’s about seeing the kids grin as the harness clicks and knowing the driver has double‑checked every latch.
So, what’s the next move? Grab that checklist, give the driver a quick “photo and harness test” call, and keep that pocket‑knife handy just in case. A few minutes now save you a frantic scramble later.
When the bus rolls out of the depot, let the excitement of the city take over. The sights, the snacks, the laughter – they’ll all feel smoother because you handled the safety side like a pro.
Finally, if you ever plan another group outing, you already have a repeatable recipe. Just plug in the same steps, adjust the seat count, and you’re set for the next adventure.
One more tip: keep a copy of the driver’s license and insurance certificate in your phone’s notes. It’s a tiny step that can save you time if anything needs verification at the drop‑off point.
Enjoy the ride, and let the confidence you’ve built turn every Madrid minibus with child seats hire experience into a memory worth sharing.
FAQ
Do I need a special licence to hire a madrid minibus with child seats hire?
In Spain the operator must hold a valid “autocar” licence for vehicles over nine seats, and the driver needs a D licence plus the DGT‑approved “child‑seat installation” endorsement. You as the client don’t need a licence, but you should ask for proof of the company’s certification and the driver’s training record before you sign the contract.
How can I verify the child seats are certified?
Ask the provider for the CE‑mark or ECE‑R44/04 label number and request a copy of the certification sheet. A quick phone call to the Spanish Dirección General de Tráfico (DGT) can confirm the registration. If the seats are pre‑installed, the driver should also show you a photo of each harness tightened, so you can match the model to the certificate.
What’s the best way to confirm the driver’s training on seat installation?
When you speak with the operator, request a short statement that the driver has completed the DGT “child‑seat installation” course and can show you the training card. A confident driver will walk you through a mock‑install on the phone or during a pre‑trip visit, pointing out how they check rear‑facing, forward‑facing and booster positions.
Can I request pre‑installed seats, and does it cost extra?
Yes, most reputable firms will install the seats at the depot the night before the trip. This service is often bundled in the price, especially with larger groups. If a surcharge appears, ask whether it covers the extra labour or a higher‑grade seat model; many operators waive the fee for bookings over a certain hour count.
What should I include in a checklist before the day of travel?
Write down the exact seat models, the driver’s name and licence number, the certification numbers, a photo timestamp, insurance details, and the cancellation window. Add a quick “harness tug test” step and a reminder to verify the latch release. Having this printed or saved on your phone makes the on‑site walk‑through painless.
How do I handle last‑minute changes to the number of child seats?
Most operators allow adjustments up to 2 hours before departure without penalty, as long as the total seat count stays within the vehicle’s capacity. Call the driver directly, confirm the new seat types, and ask for an updated photo. If the provider can’t accommodate the change, they should offer a comparable vehicle or a full refund for the seats.
What insurance coverage should I look for when booking?
Ask for a passenger‑liability policy of at least €1 million that explicitly lists “child‑seat equipment” as covered. The insurer should be a recognised Spanish carrier such as Mapfre or AXA. Verify the policy number and keep a PDF handy; in the unlikely event of an accident, this document speeds up claims and shows you’ve done your due diligence.